
I had the following question sent to me – “Pretend it’s the very first time you tried to paint, could you give me a step by step method to get started?”
That’s something many people can relate to. The person also told me the reason for this question…”That blank canvas is rather unnerving!”
So, let me answer the question because I’ll bet many of you have the same question.
First, is the preparation of your painting surface. Most of the time this is canvas, but it can be a wooden panel, even paper. I won’t cover the steps to properly prepare your canvas here because that is it’s own VERY IMPORTANT lesson.
Let’s assume you have the painting surface prepared properly, you most likely will want to get rid of the harsh white of the canvas.
(There are sometimes when you may want to keep the white of the painting surface – for example…When you get more advanced or when you want a very high keyed – bright looking work – Like some impressionists used for their outdoor scenes)
Let me first tell you why I want you to start with a toning layer.
The most important reason is that it will help you and make things easier for you. The old masters did many things out of logic and necessity. Toning your canvas to get rid of the white was logical.
This tone value will play a role in the building up of your underpainting that you are going to start with.
In the beginning layer of paint, when you either leave this dark tone layer to show on it’s own or lightly cover it will play a role in the painting.
1) I want you to start with a monochrome underpainting.
This is the traditional way and it makes things easier for you and I am all about making things easier for you.
You see, dividing the painting process this way separates all the parts of making a painting into their own sections. You don’t have to deal with all the problems all at once. So, for a beginner I want you to start with a dark brown toned canvas. Again, I can’t cover exactly how to tone tone your painting surface here, I am just giving you the basic steps that you will follow to begin your painting.
2) Squeeze out some white paint (a fast drying white) and black on to your palette.
Note: If you ask “how much?” my answer is enough to use. Don’t get so worried about something so trivial. You squeeze out enough paint to use. If it’s not enough, squeeze out more.
You are going to let the darker tone of your canvas play an important role in your underpainting.
Using one of your smaller bristle brushes and mix up a light gray.
To make this mixture: Start with the white and slowly add the black into it instead of starting the opposite way. It’s easier to make a light color darker, than make a darker color lighter.
3) Start Making Your Drawing.
You will now take that smaller bristle brush and start placing some outlines to make your “skeleton” drawing. (this is just one of the ways you can place your drawing) You can use one of the methods and techniques I demonstrate for you in my “How to begin?” course for how to get a good composition and other ways to get your drawing on your painting surface. I won’t cover that here.
Your painting surface, properly prepared will make the application of paint very easy…much more so than if you were to just buy one of those cheap canvases in a craft store, rip open the packaging and begin.
I will say over and over again – bad preparation and bad materials lead to bad paintings.
If you need to, dip your brush into a little bit of your medium to make the paint you are using a little bit thinner and more flowing, only if you need to.
Don’t just add medium blindly, or because someone told you once that you have to. Only use it if you need it…
The same way you wash a pot by pouring some liquid soap into it, add water and then judge if you need more
water or not.
Do not take much paint on your brush while you are doing these steps. You will build up the amount of paint as you go. Of course, don’t be so scared of using too much paint that you barely make a mark on the canvas.
DO NOT: make one outline and think you are doing something wrong if you adjust it. Nothing is final yet. This is not a paint by numbers set.
You are using just white and black so there are really no mistakes you can make.
You can mix up a light gray and use it thinly so that the dark tone of your canvas shows throw or you can lay the gray on a little thicker to cover the dark tone layer and you will see what a variation of tone values you can attain just by varying the thickness of your gray mixture. The thicker your mixture, the more your toning layer will be covered. The thinner your mixture, the more your original toning layer will show through.
Think of drawing with white chalk on a blackboard.
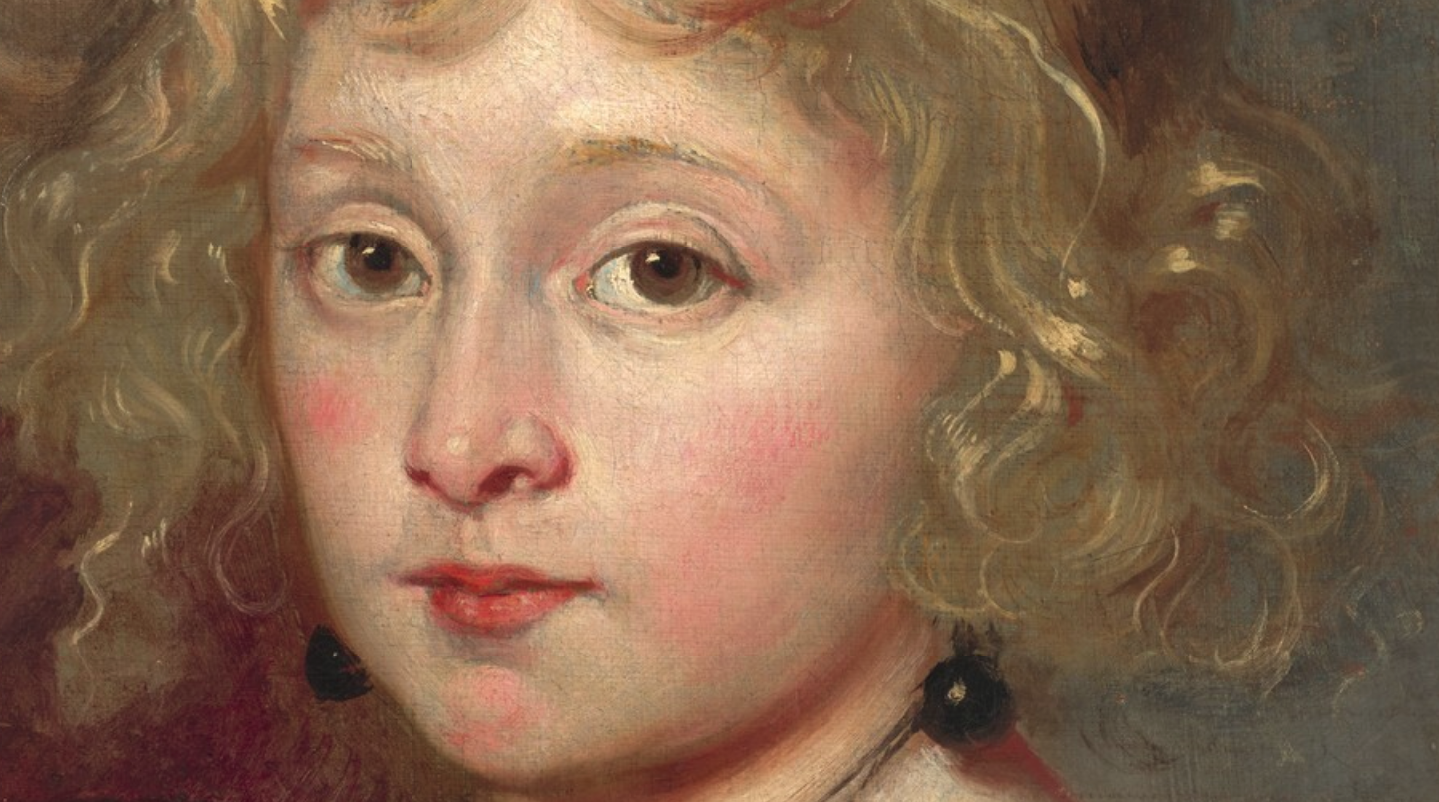
The picture at the top of this article, was created with the procedure I am describing. If you look at the girls face in her cheek and chin, as well as some other places, you can see the gray underpainting showing through.
4) Divide everything you see, in your mind, into light and dark.
You do not care about the color of any object right now, only the tone values the lights and darks.
You can pick if you want to start with darks or lights of the objects you are painting and then work toward the opposite end…
Dark to light or light to dark.
In the darker areas, you will leave the darker tone of your canvas to show through.
You can add a gray that is darker than the tone value you already have and use this mixture for the darkest darks. And, you can use the light gray mixture that you started with and apply thicker for lighter areas.
For the lightest light you may want to use just pure white and lightly add it into the paint you already have on the canvas.
Do not be scared of making mud, as it’s impossible to do just using black and white.
This would be the beginning of your painting…the underpainting – step 1.
You would continue the painting process which would include going over the underpainting again and making things more definite…adding the coloring layers with glazes and veilings and some direct painting. The adding of details would come later on.
But this covers an overview of a definite step by step procedure to use from scratch. It gives you a way to start from your blank canvas that you can use over and over again to produce any painting.
Further Study
If you liked this introduction, I have an “Action Plan” course called “How to begin?” that you can check out here
Click Here to check out the “How To Begin” action plan
Keep on learning.
you do give such helpful advice thankyou
Ethan, thank you! I suddenly realiced I bought your 7 dvd’s several years ago. Now I’m back to the easel,after a long and painful time.So those lessons of yours gives me a lot.
Elsa Marthinsen